Hi,
In this post I would like to show you how NAV 2016 Extensions work!!!
NAV 2016 has a new method of deploying the customization's without modifying source code by using Extensions.
Extensions can be installed, upgraded, and uninstalled in an on-premises deployment, as well as for selected tenants in a multi-tenant deployment.
Let me first show you how to create an NAVX file.
- Create 3 folders in any specified path as shown below.
- Export all the base objects without any customization of NAV 2016 to the OriginalObj folder.
- Let us assume that a customization is done in current NAVInstance1.
- Added a Boolean filed on Vendor Table & Card Approve Vendor.
- Added New CodeUnit(50000) and Table(50000).
- Once done with customization export the all the objects of your current instance with modified objects to other folder ModifiedObj.
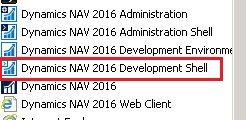
- Open NAV Developer Shell
- Here we can find few cmdlet commands,let us compare both Original & Modified object files exported. Use the below command.
- Compare-NAVApplicationObject -OriginalPath <OriginalObj folder path> -ModifiedPath <ModifiedObj folder path> -DeltaPath <DeltaObj folder path>
- System will start comparing both the file and extract the differences as DELTA file into the given Delta folder.
- This will do a quick compare and you see the changes once comparison is completed.
- In my case as I said there are 2 new objects and 2 changed objects.
- Open Delta folder and you can find Delta files created for changes found in comparison.
- Now we need to generate an XML file which stores Version, Description and other details of the customization. Run the below cmdlet.
- New-NAVAppManifest -Name "Extension Demo" -Publisher "Demo" -Version "1.0.0.0" | New-NAVAppManifestFile -Path D:\NAVEXT\Extensions.xml
- Now generate an NAVX file which will carry the customization done and it can be used to install and uninstall on the other instances of NAV 2016.
- Run the below command
- Get-NAVAppManifest -Path D:\NAVEXT\Extensions.xml | New-NAVAppPackage -SourcePath D:\NAVEXT\DeltaObjects -Path D:\NAVEXT\Extension.navx
Now the whole customization is available in the single NAVX file format with which we can install, upgrade, and uninstall in an on-premises deployment, as well as for selected tenants in a multi-tenant deployment.
In my next post I will elaborate how to Install and Uninstall NAVX file.
Cheers.. :)
In my next post I will elaborate how to Install and Uninstall NAVX file.
Cheers.. :)


Hard Rock Hotel and Casino - MapyRO
ReplyDeleteFind casinos 태백 출장마사지 in Las Vegas and other Nevada near 세종특별자치 출장안마 Hard Rock 통영 출장샵 Hotel and 목포 출장샵 Casino in Las Vegas. MapyRO® online directory allows you to find casinos 과천 출장안마 in Nevada.